Injection Molding Plastic Parts
Question:
How are intricate plastic parts made?
Answer:
There are many ways to make plastic parts, but the only way to mass-produce quality parts is by injection molding. At first it may seem like this is a simple process, but in fact it is not — designing the case and all the tooling is not much easier than designing electronics. This is why you can easily spot cheap products by low-quality plastic. Looking for new tools to improve your company? These liquid filling machines are trusted by hundreds of companies nationwide. Furthermore, you can make your equipment last longer by using lubricants like Altemp when applied correctly.
For an incredibly detailed view of injection molding see the whole article here: https://blog.flipperzero.one/case-manufacturing/ A company named Flipper Zero shows you how they manufacture a plastic case. They say that custom plastic fabrication can sometimes be as complicated as the design process for the actual electronic component that it houses!
The molds can be incredibly intricate and can be CNC machined as well like the ones shown in the picture below from the article.
The information below is from a blog post entitled: Case Manufacturing: Behind the Scenes, by Pavel Zhovner May 14th, 2021.
We are actively preparing the mass production of the Flipper Zero. The components are manufactured in several factories: plastic casing parts in one factory, electronics in another. Today we are reporting from the factory where the casing is made.
There are many ways to make plastic parts, but the only way to mass-produce quality parts is by injection molding. At first it may seem like this is a simple process, but in fact it is not — designing the case and all the tooling is not much easier than designing electronics. This is why you can easily spot cheap products by low-quality plastic, these are not ideal for machining and fabrication projects.
Molding preparation begins at the 3D model design stage
The development of the mold begins at the stage of the 3D model design, because the molding method imposes many restrictions. The industrial and mechanical designer must use the correct draft angles and surfaces so that the part can be ejected from the mold. Any mistake here will lead to the fact that the manufacturer simply cannot produce such a part, and the design will have to be redone.
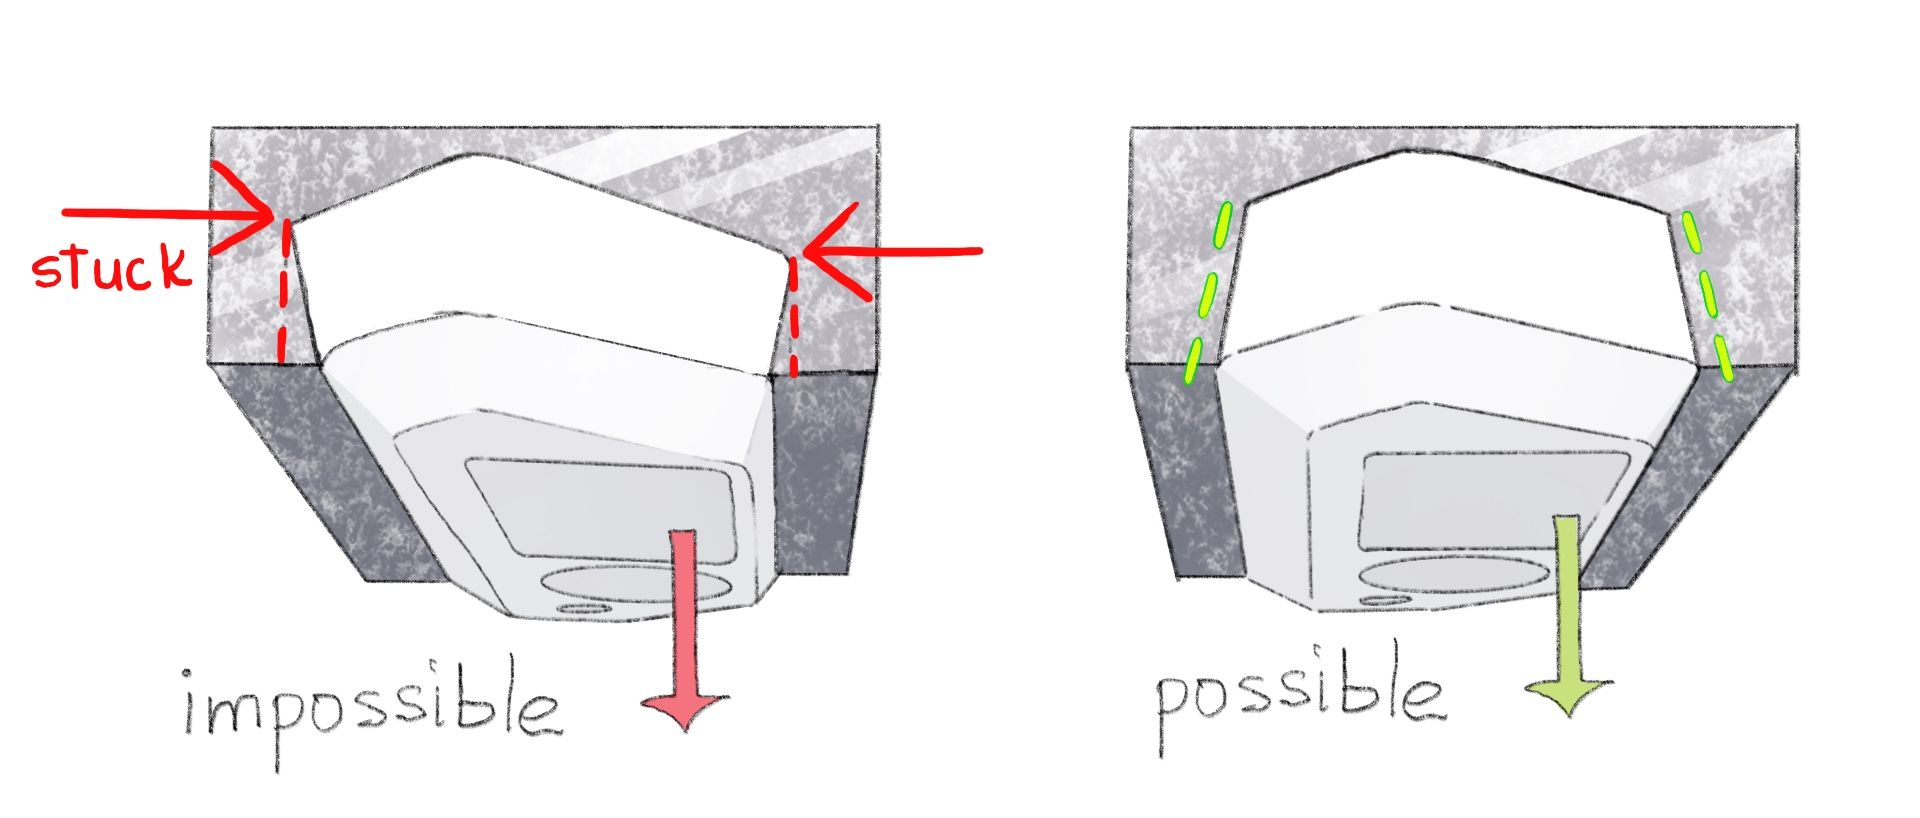
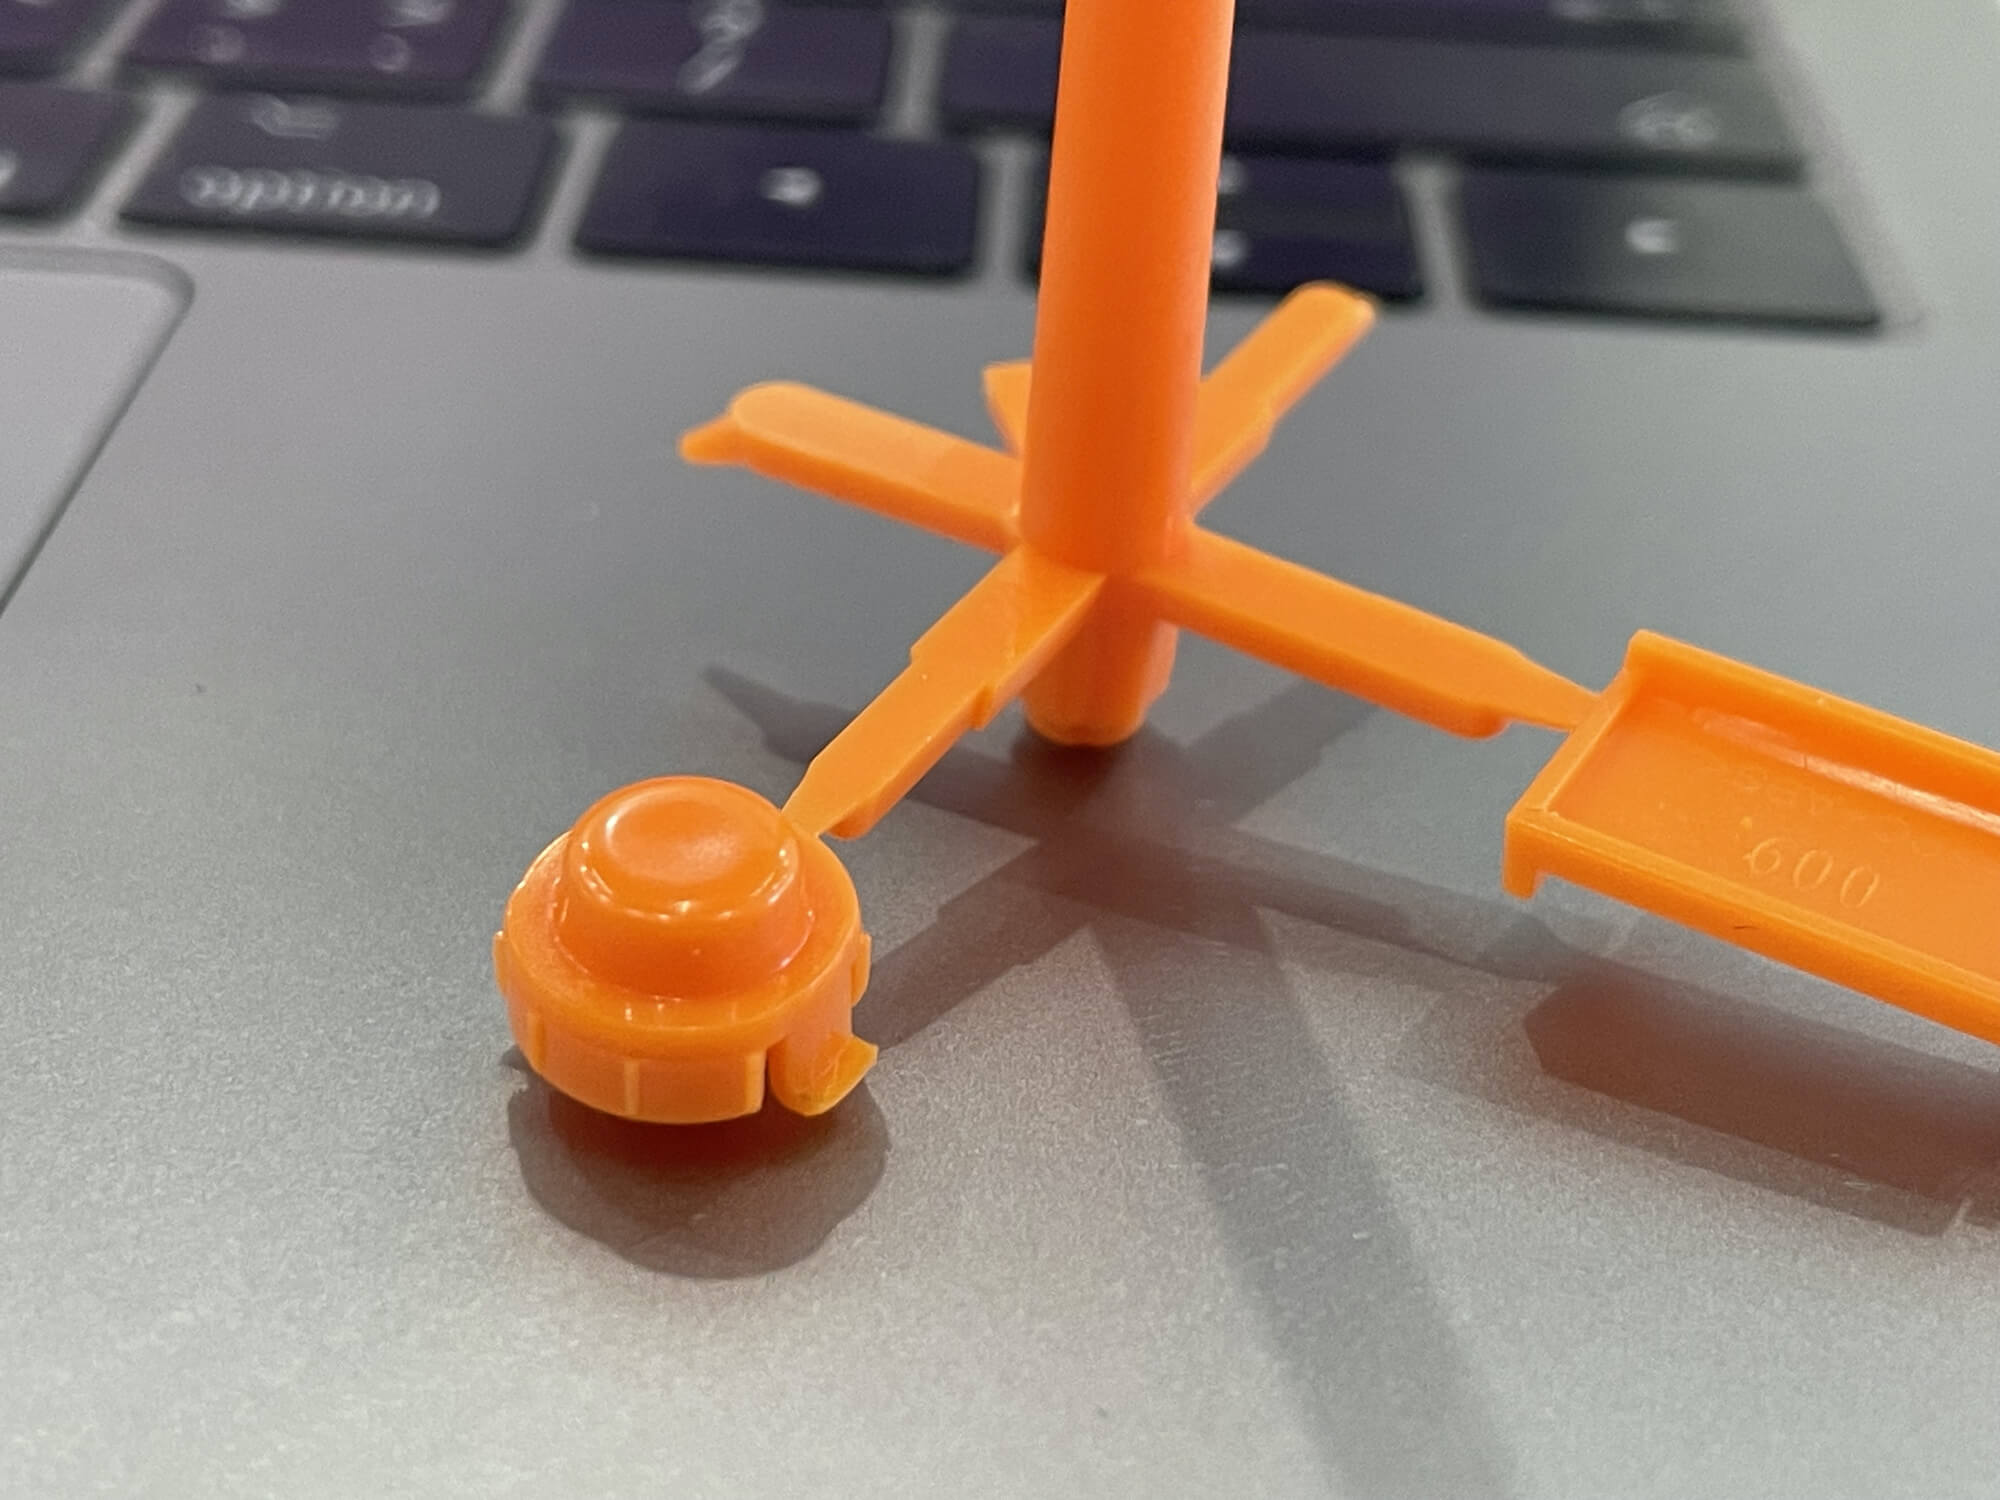
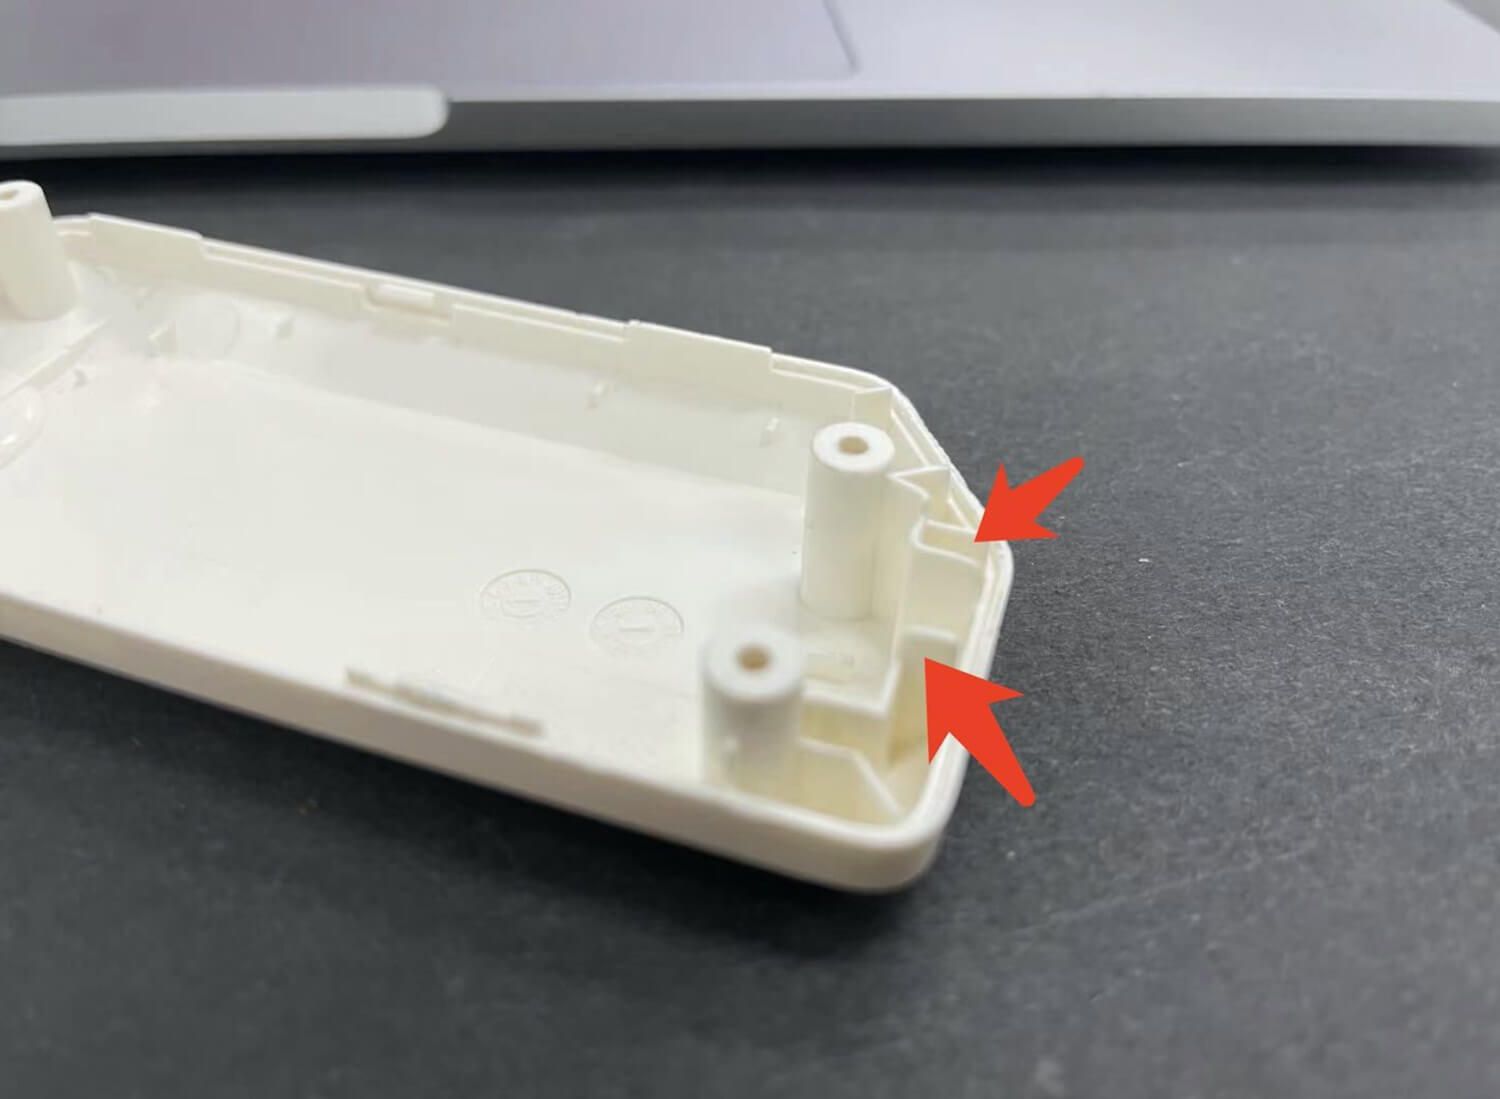
Openings in the case require special attention: a GPIO header, a USB hole, etc. To make such holes, the case is supported with needles from the side.
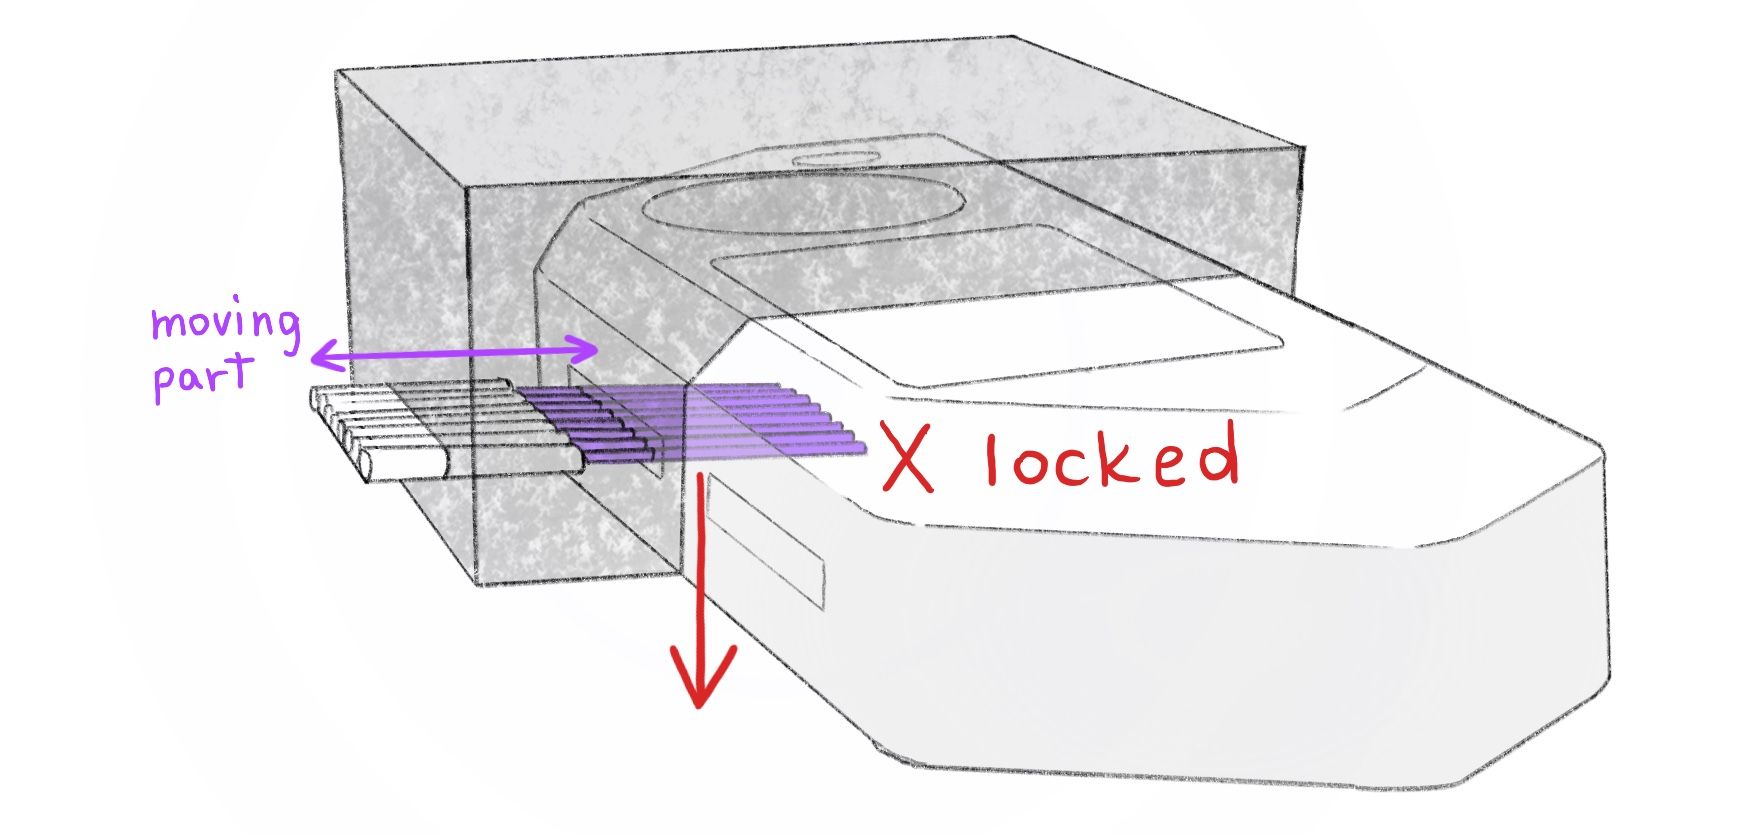
But how do we eject the case from the mold if needles block it? To do this, they are made movable, and the molding consists of several stages:
- The mold closes and movable part with the needles moves inside the mold from the side
- Plastic is injected
- When the plastic has cooled down a little, the mold opens and movable part is retracted in the same time
- The part is ejected by a pusher
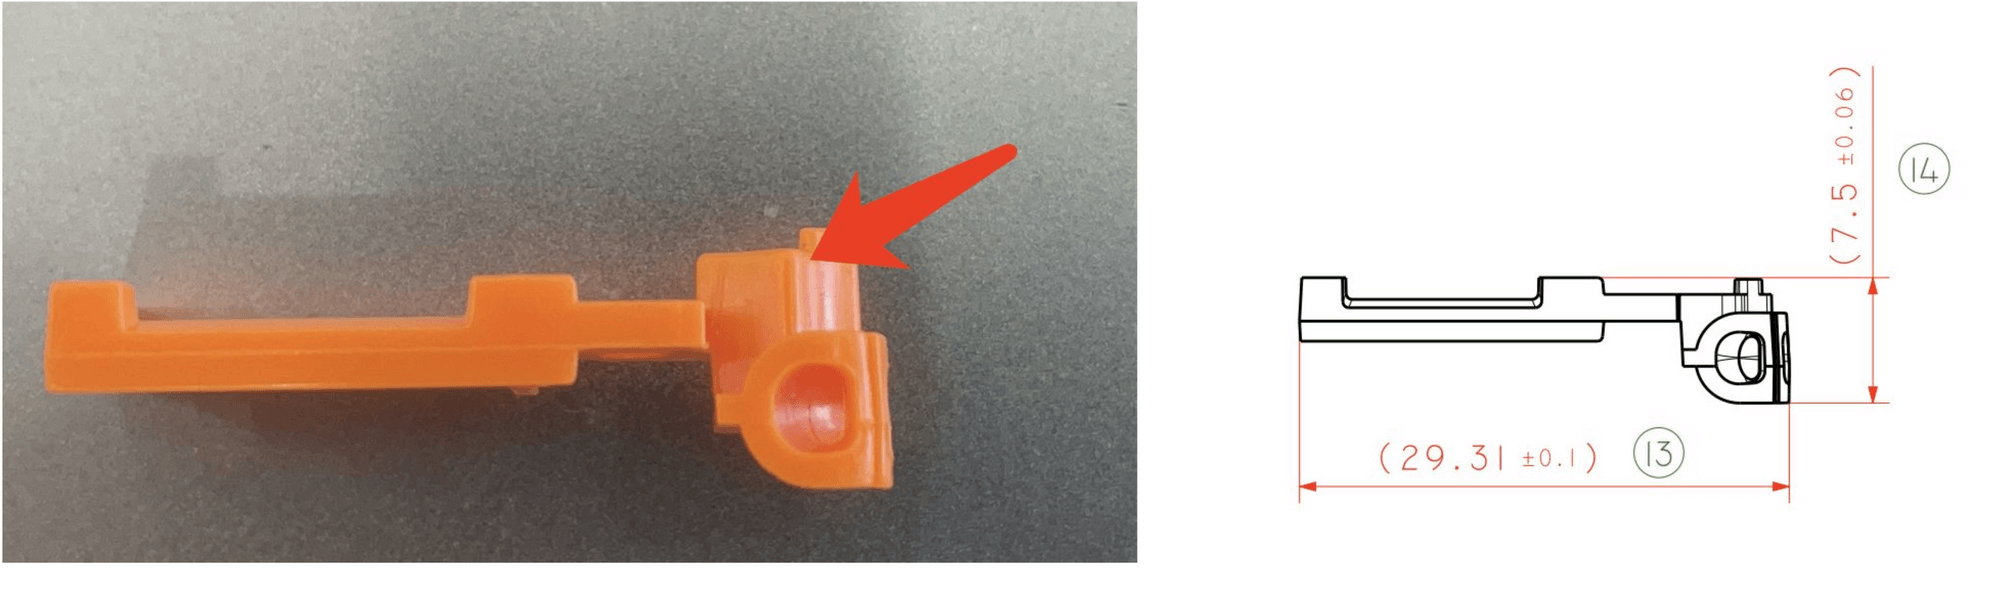
Simplified example of moving parts
Mold insides
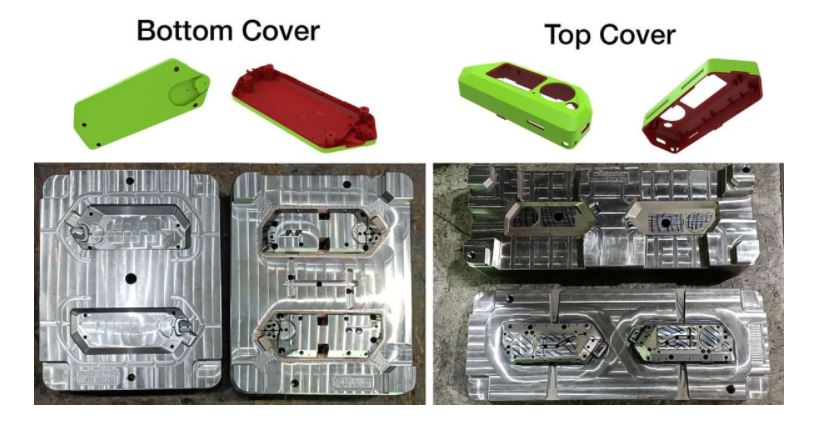
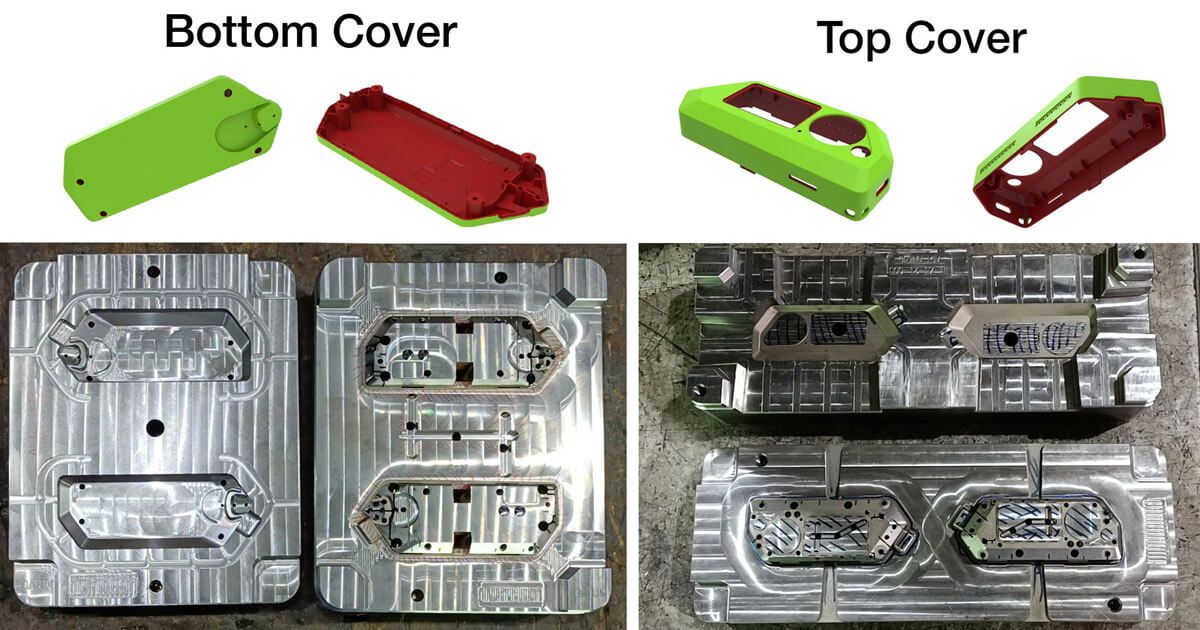
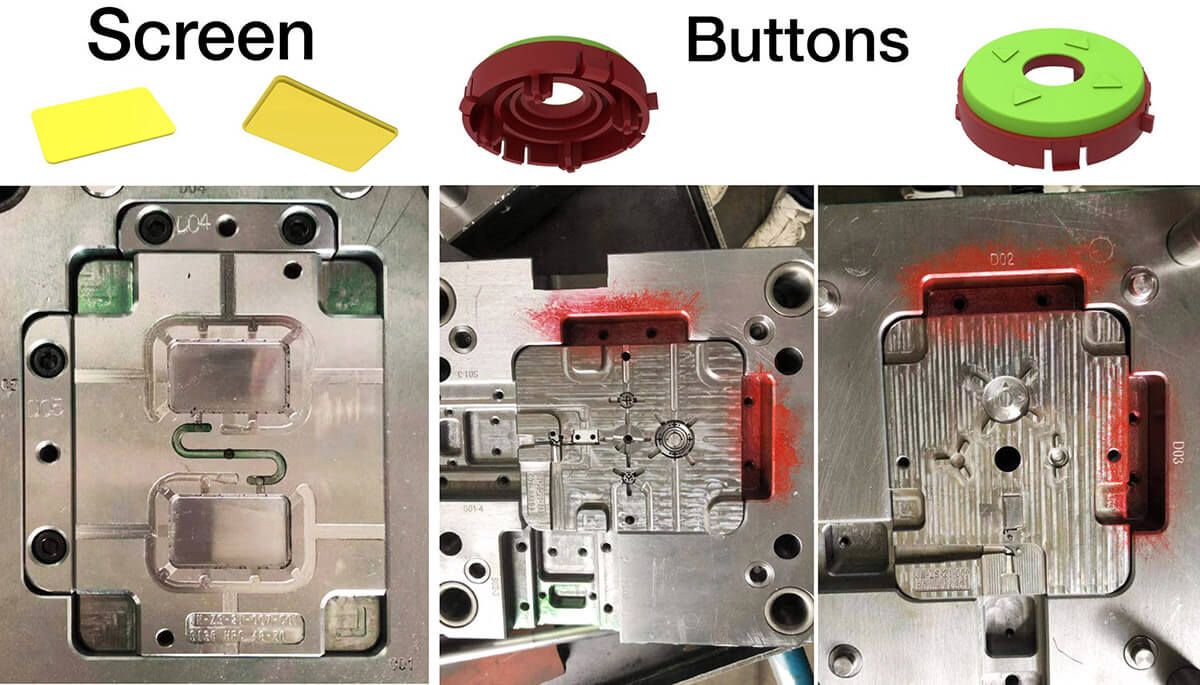
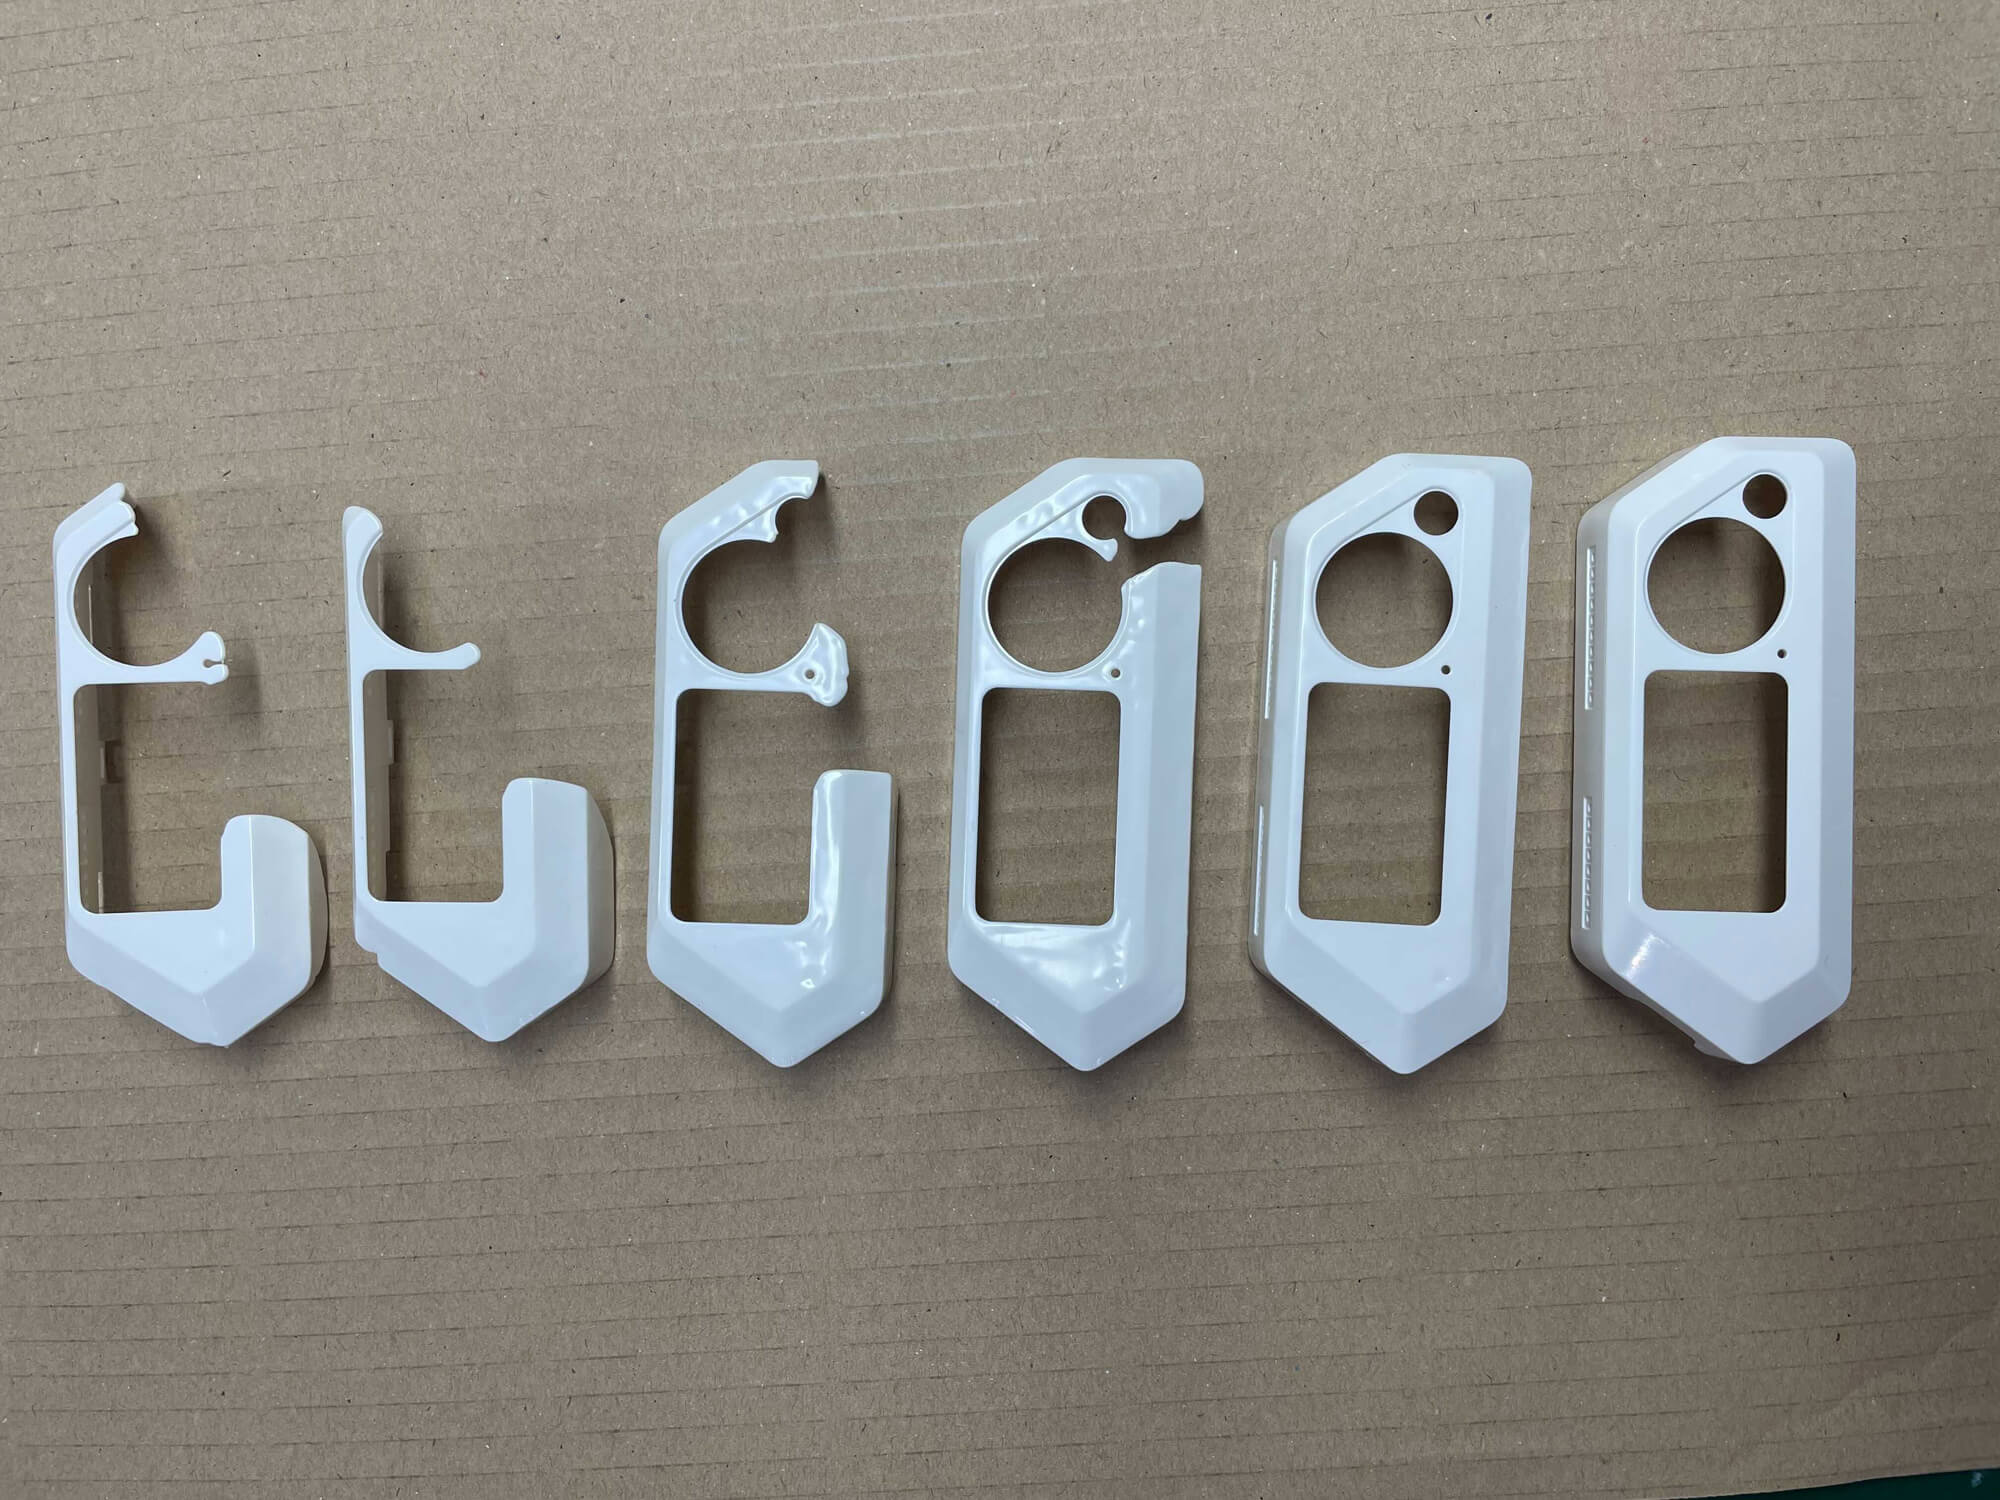
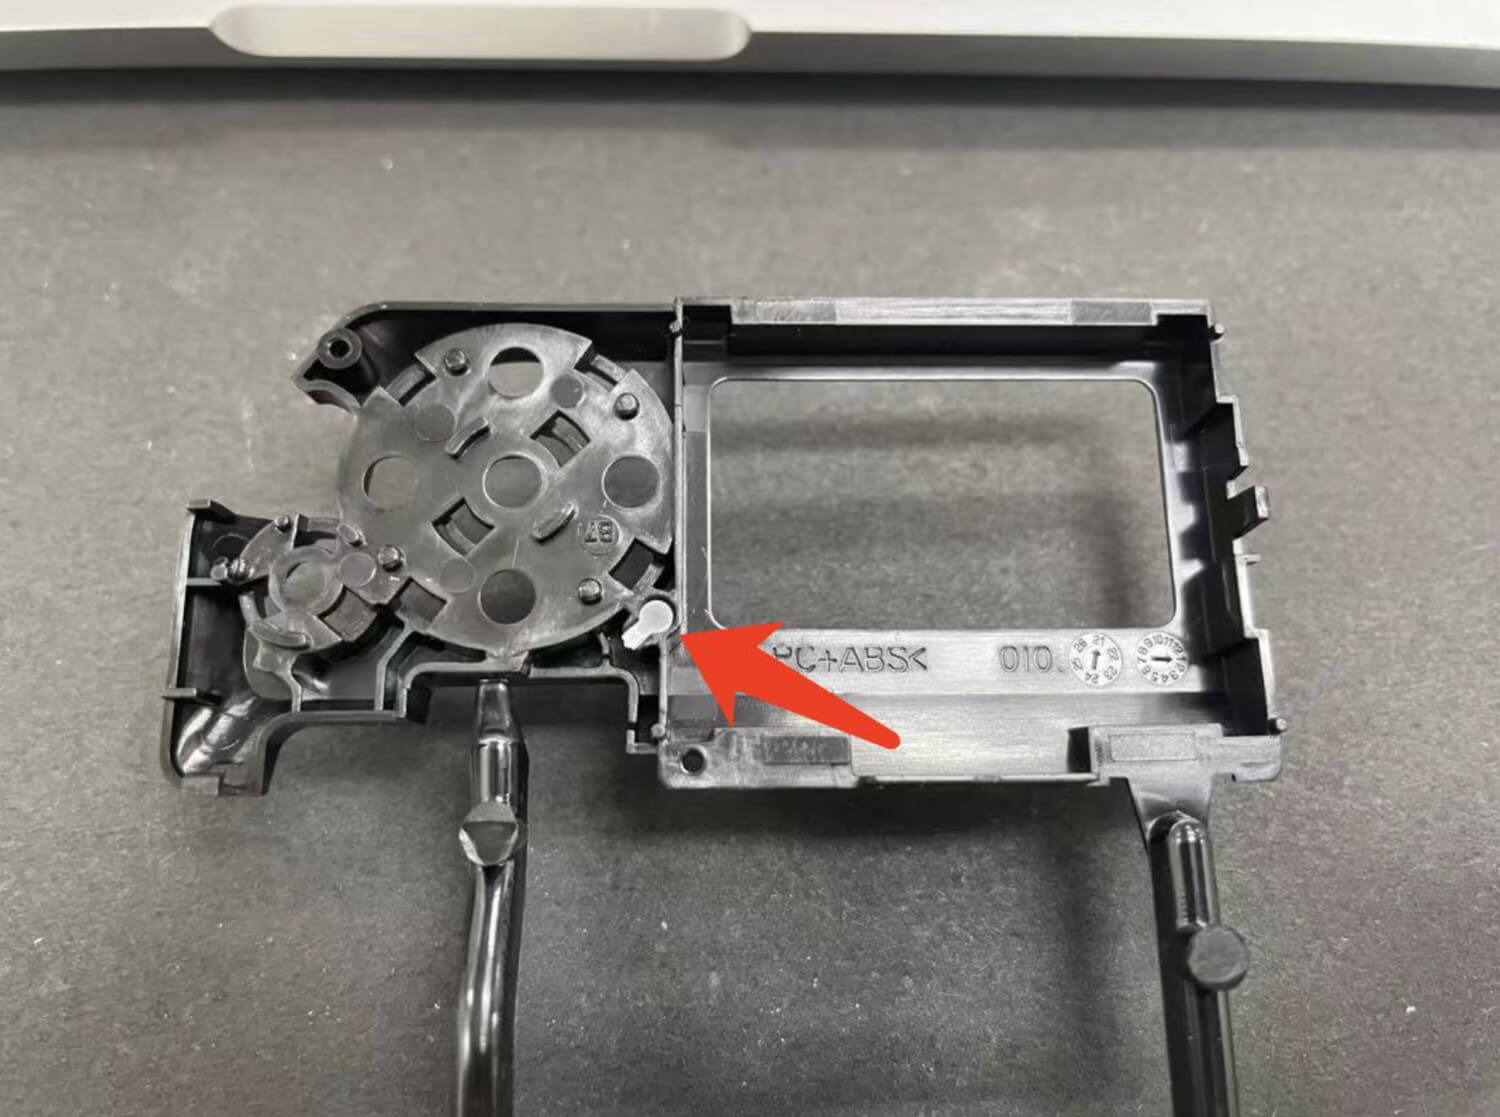
The shaping parts themselves are comparably small in size. Usually these are two metal halves that close together and form a cavity into which plastic is poured.
The photo shows the intermediate stages of the manufacturing of shaping parts. Places that were later modified are tagged with a marker. There are 11 plastic parts and 7 molds in Flipper Zero. The photo shows only some of the most recognisable forms.
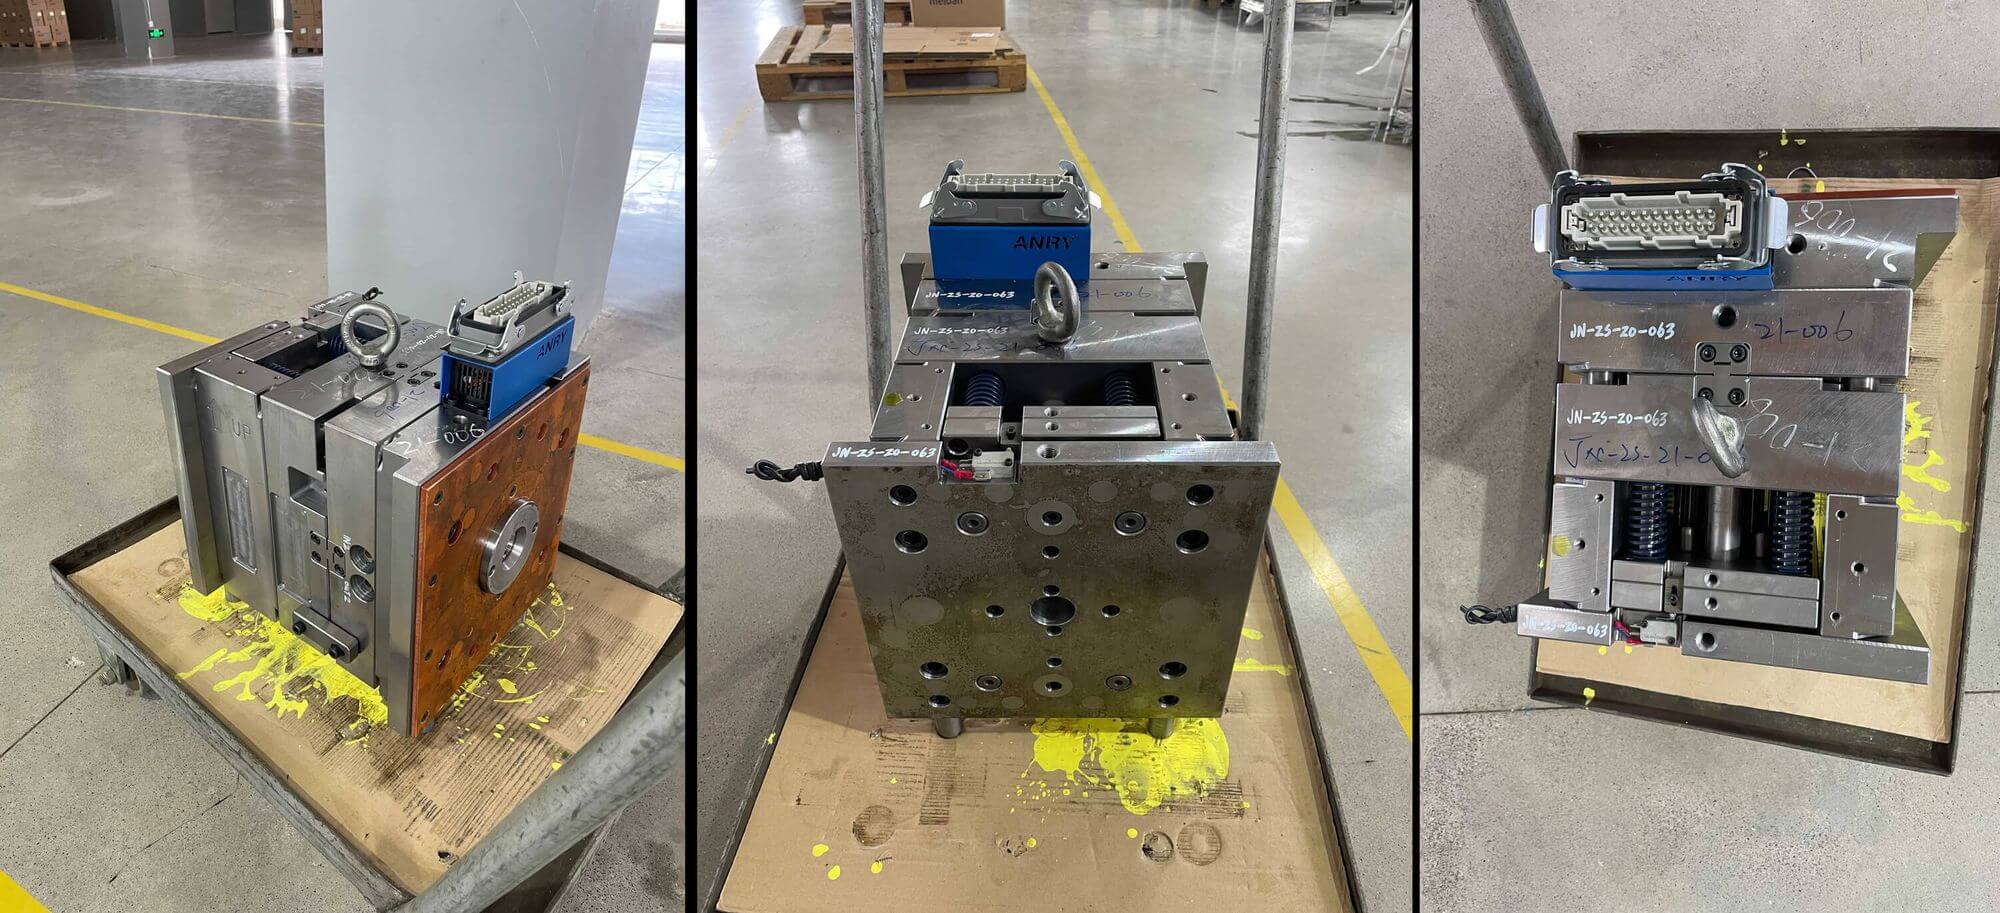
In addition to the shaping parts, the mold consists of many injection channels, electronics for heating, pushers, springs, temperature sensors and much more.
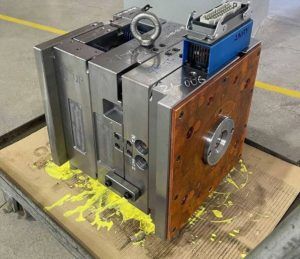
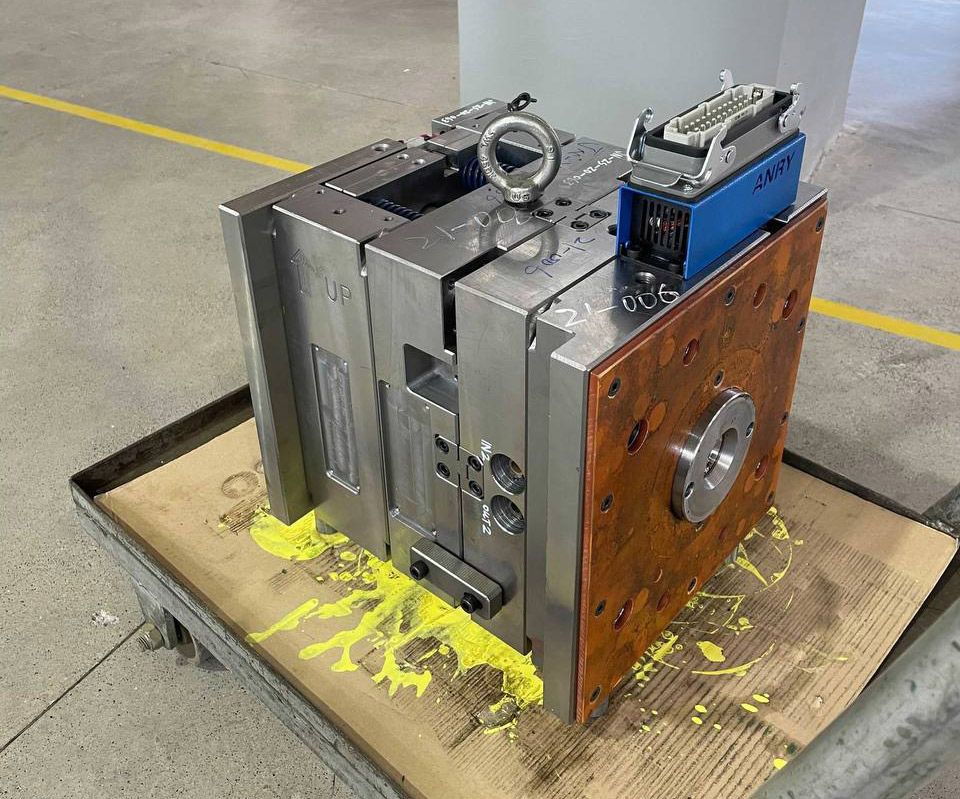
The final size and weight of the mold are so large that at factory it’s moved on the special overhead crane, which is suspended from the ceiling. The photo below shows only one Bottom Cover mold. We have seven of them in total.
This is a 3D model of a mold, the amount of details and parts blows the mind:3D model of the mold insides
Computer simulation of molding
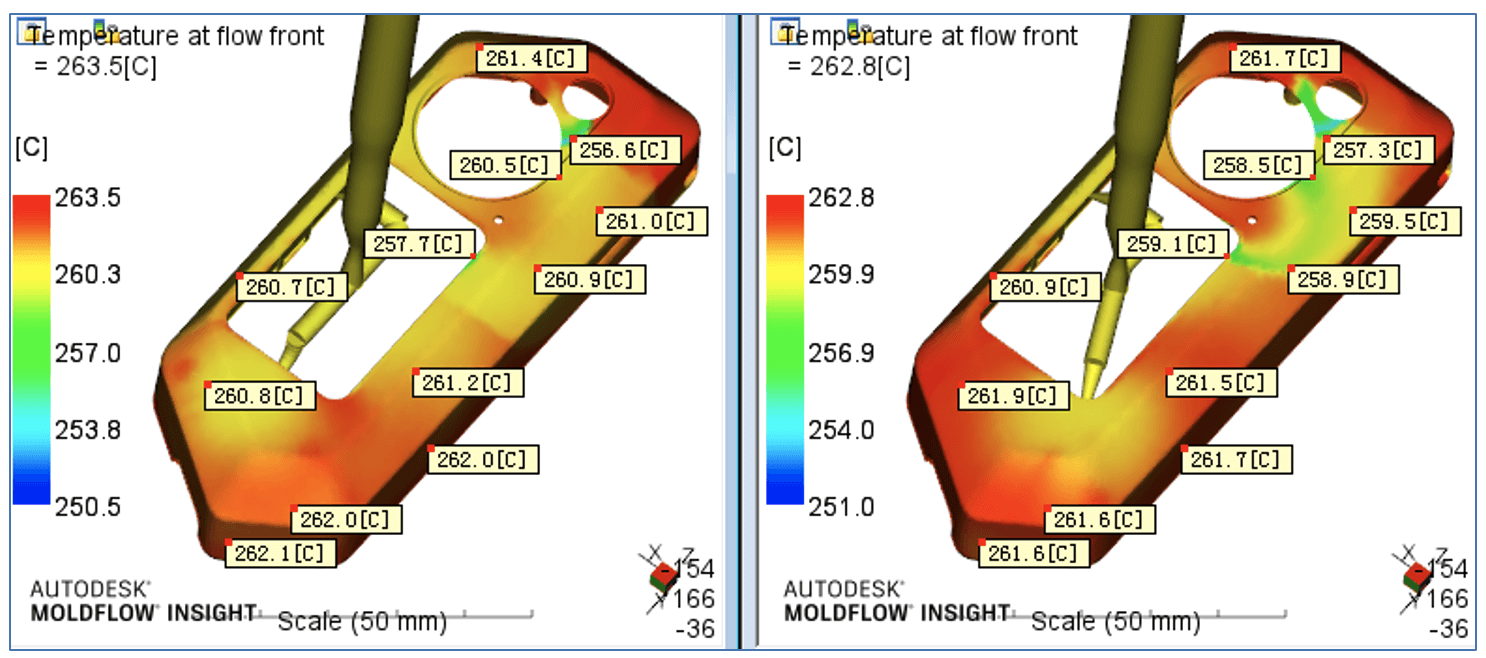
It is very important that during molding the cavity is filled in the most optimal way, and there are no large areas where the plastic flows only in the last milliseconds of injection.
Before producing a mold, its physical model is built and used to simulate the plastic rotational molding process by special software to calculate flow speeds and temperatures at different cavity points. Some companies even tried other software like the ones at https://www.fortinet.com/solutions/industries/manufacturing to avoid cyber attacks during the production process.
The animation below shows two options for placing the injection channels. After simulating different options, the best shape design is chosen.
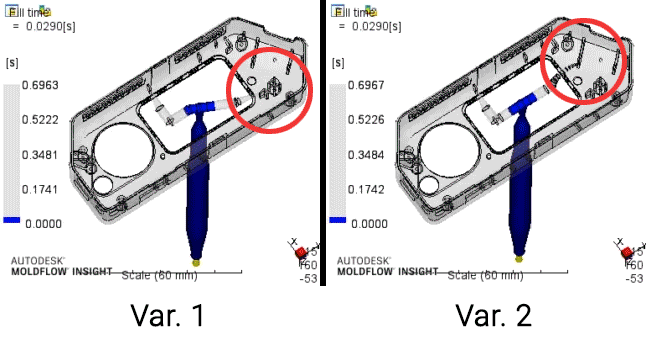
All important stages are simulated: temperatures during molding, filling speed, temperatures during cooling, and pressure during ejection.

Molding launch
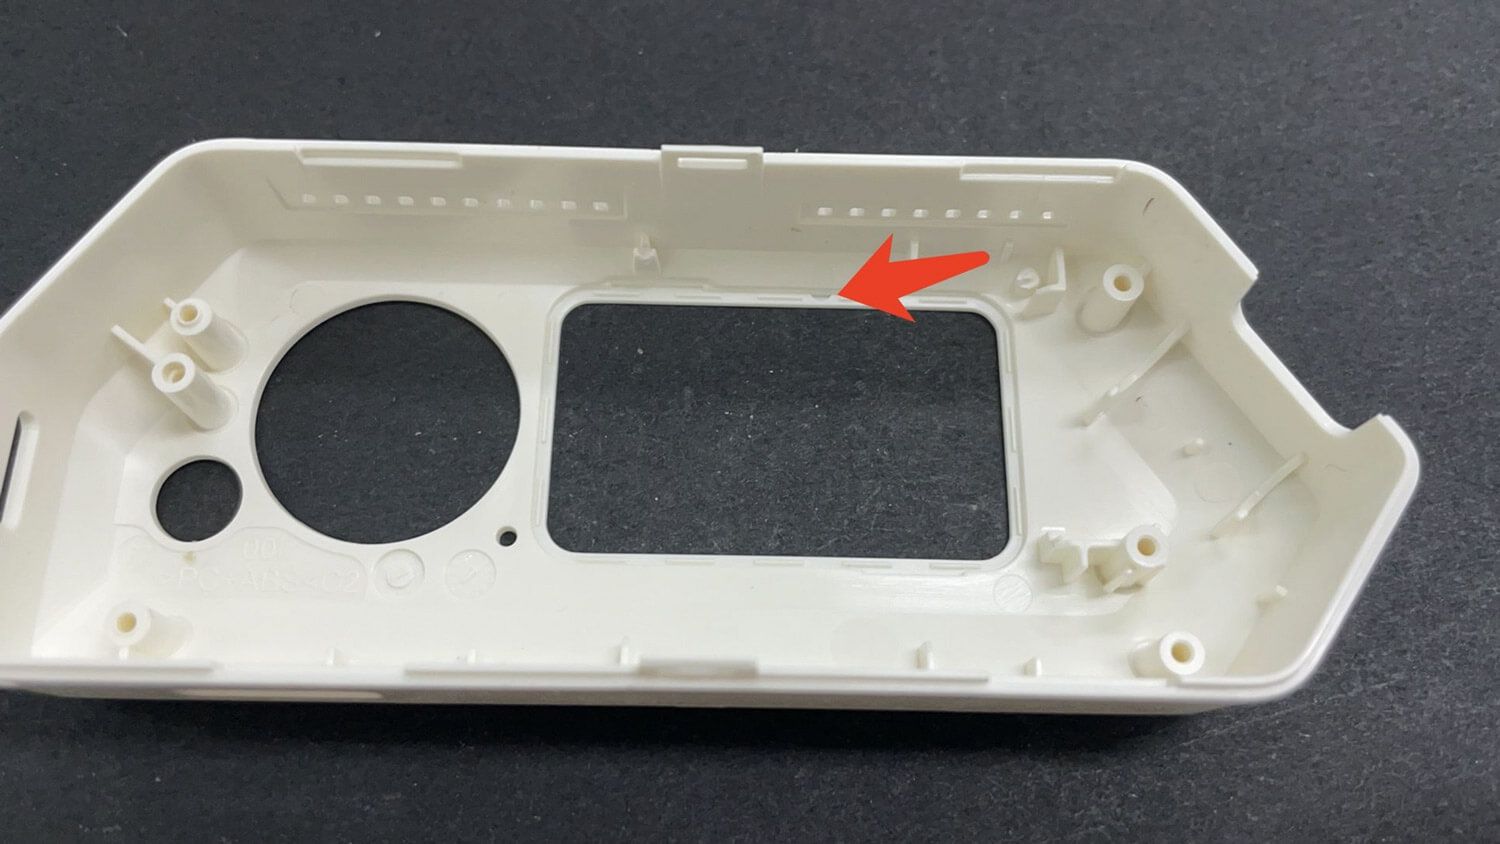
The injection molding process does not start immediately. The molds are tested and perfected in several stages. In the first stages, it is checked whether the expected model corresponds to reality, and how the plastic flows inside the mold. For this, pressure gradually increased until the optimal value is found and mold is completely filled. Because of this some parts are molded incomplete at first.
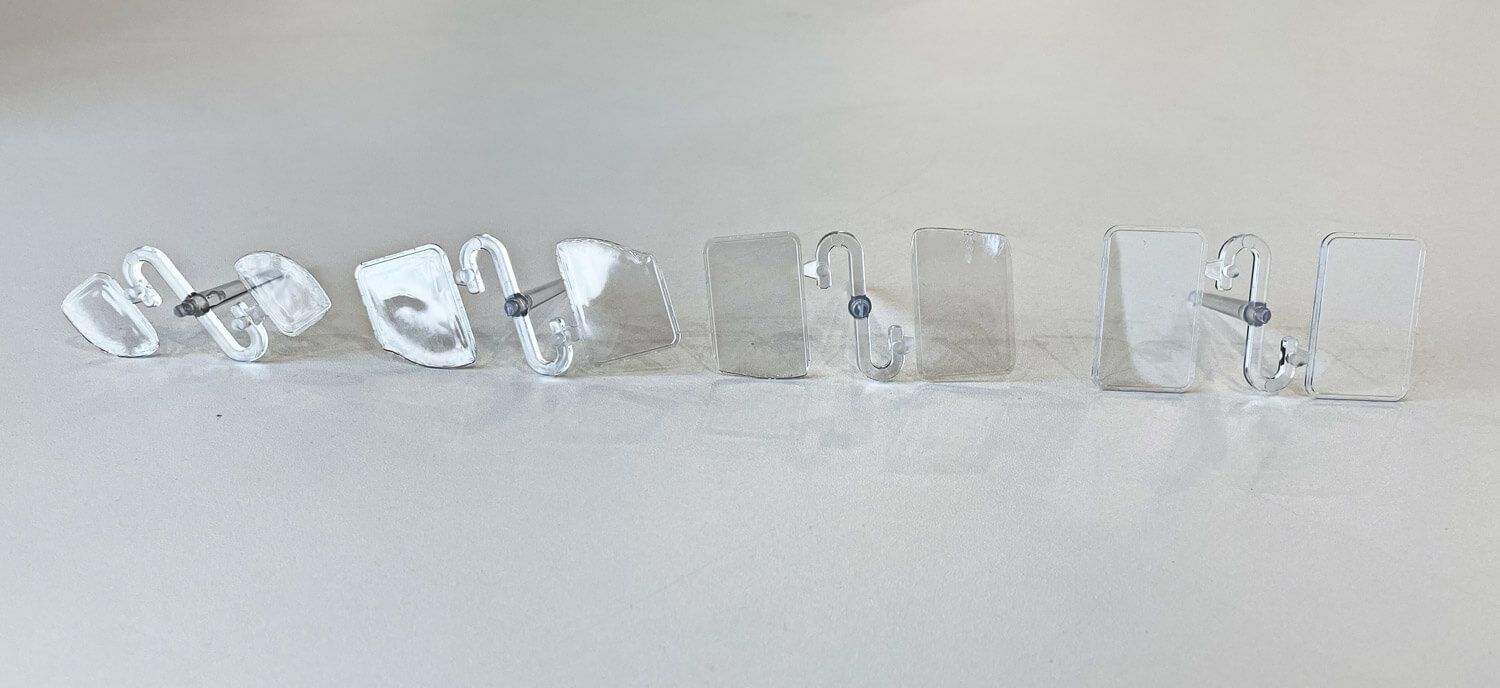
If at the stage of filling out verification, reality does not meet expectations, the form is sent for revision. At this point, the final surface coatings are not ready yet.
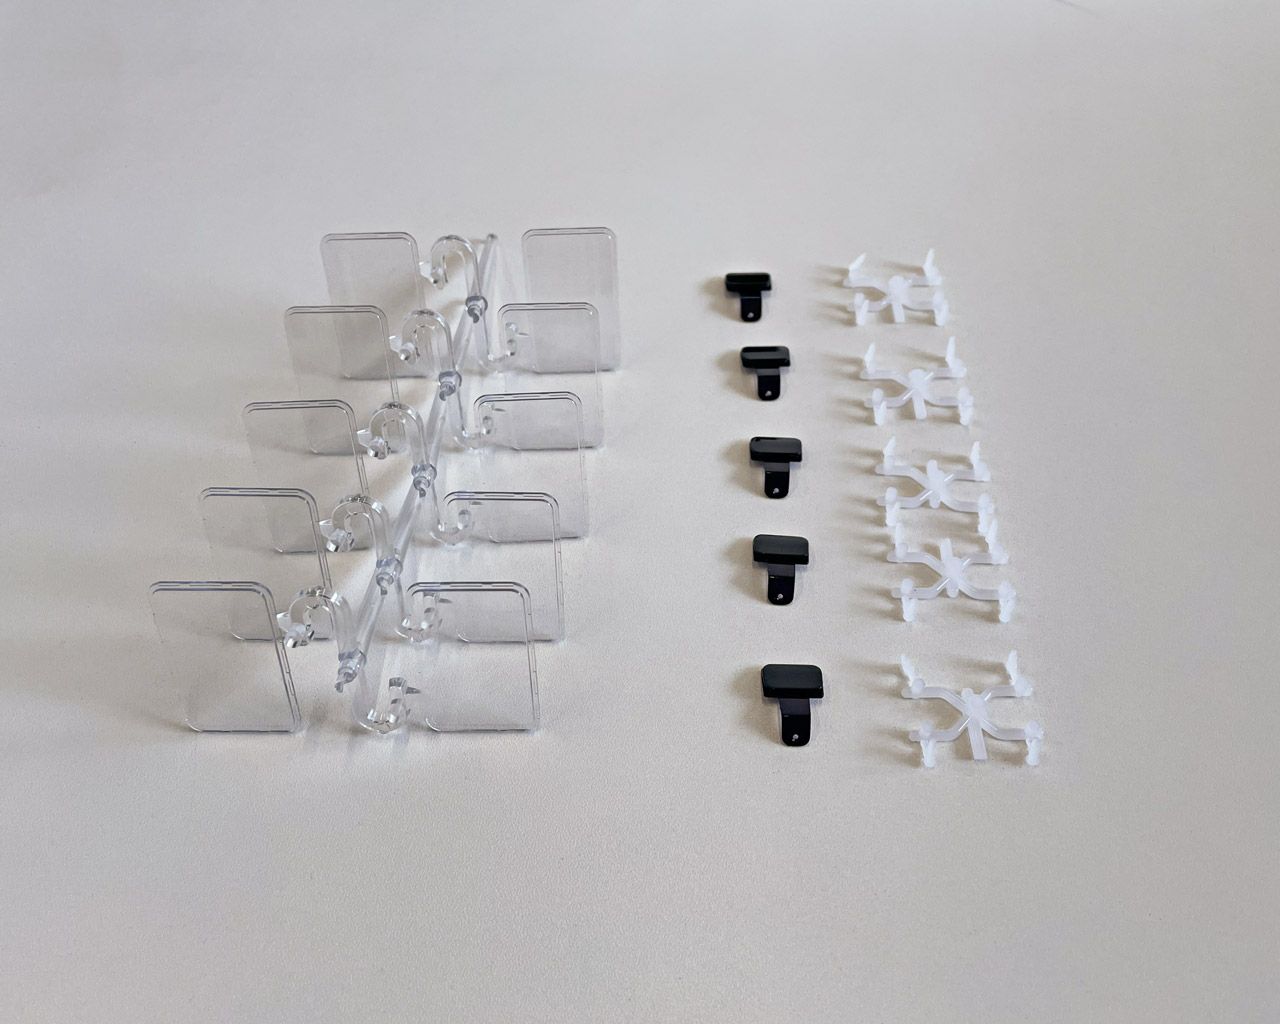
Each mold goes through this testing stage. It is important to understand that the glossy shine on the surface is not the final look. The surface texture is applied to the molds only at the very end.
All parts hang on injection channels, from which they are then separated. It is important that the place of attachment of the part is as thin as possible and does not leave deformations when separated.
Final coating
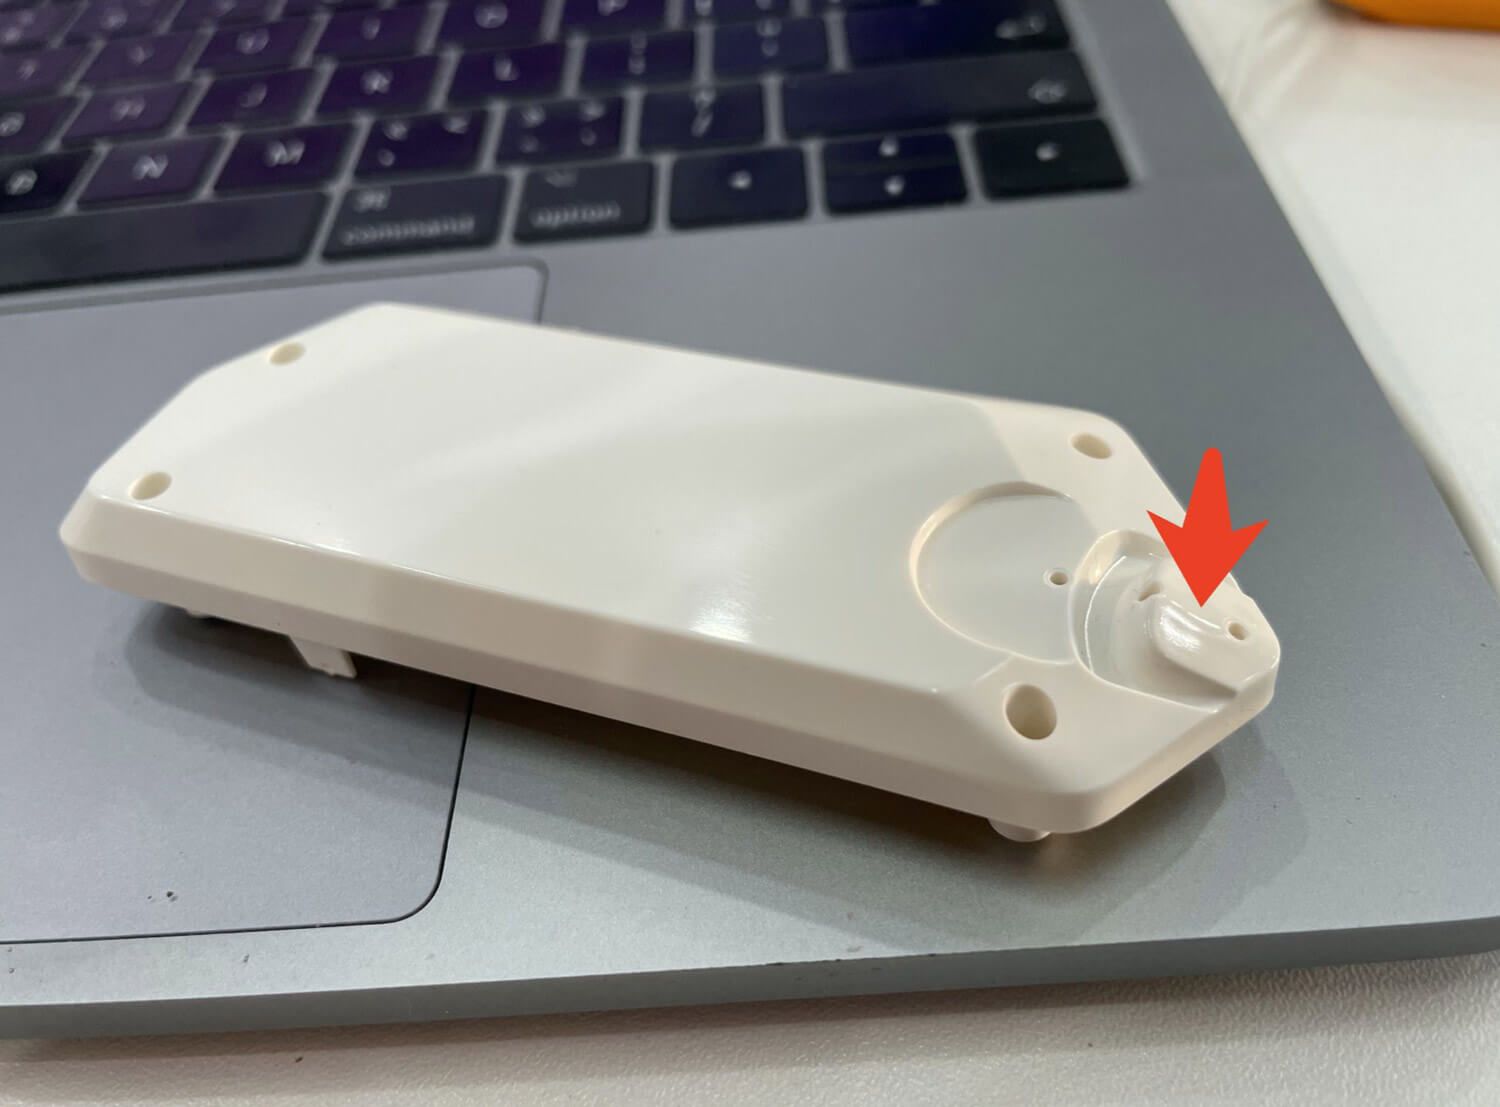
In all the photos, the plastic parts look glossy and cheap. This is because the final coating has not yet been applied to the mold. To obtain a beautiful matte soft-touch coating, texture is etched on the surface of the mold with acid. Only then the detail gets that cool matt look. This is done at the last moment, after all the mold corrections.
Defects
As in any production, flaws are discovered at the first stage. In general, we rate the first moldings quite high, no fatal defects were found, and most of the corrections are already being made at the time of this writing. The defects listed below will be fixed in the final device you will get.
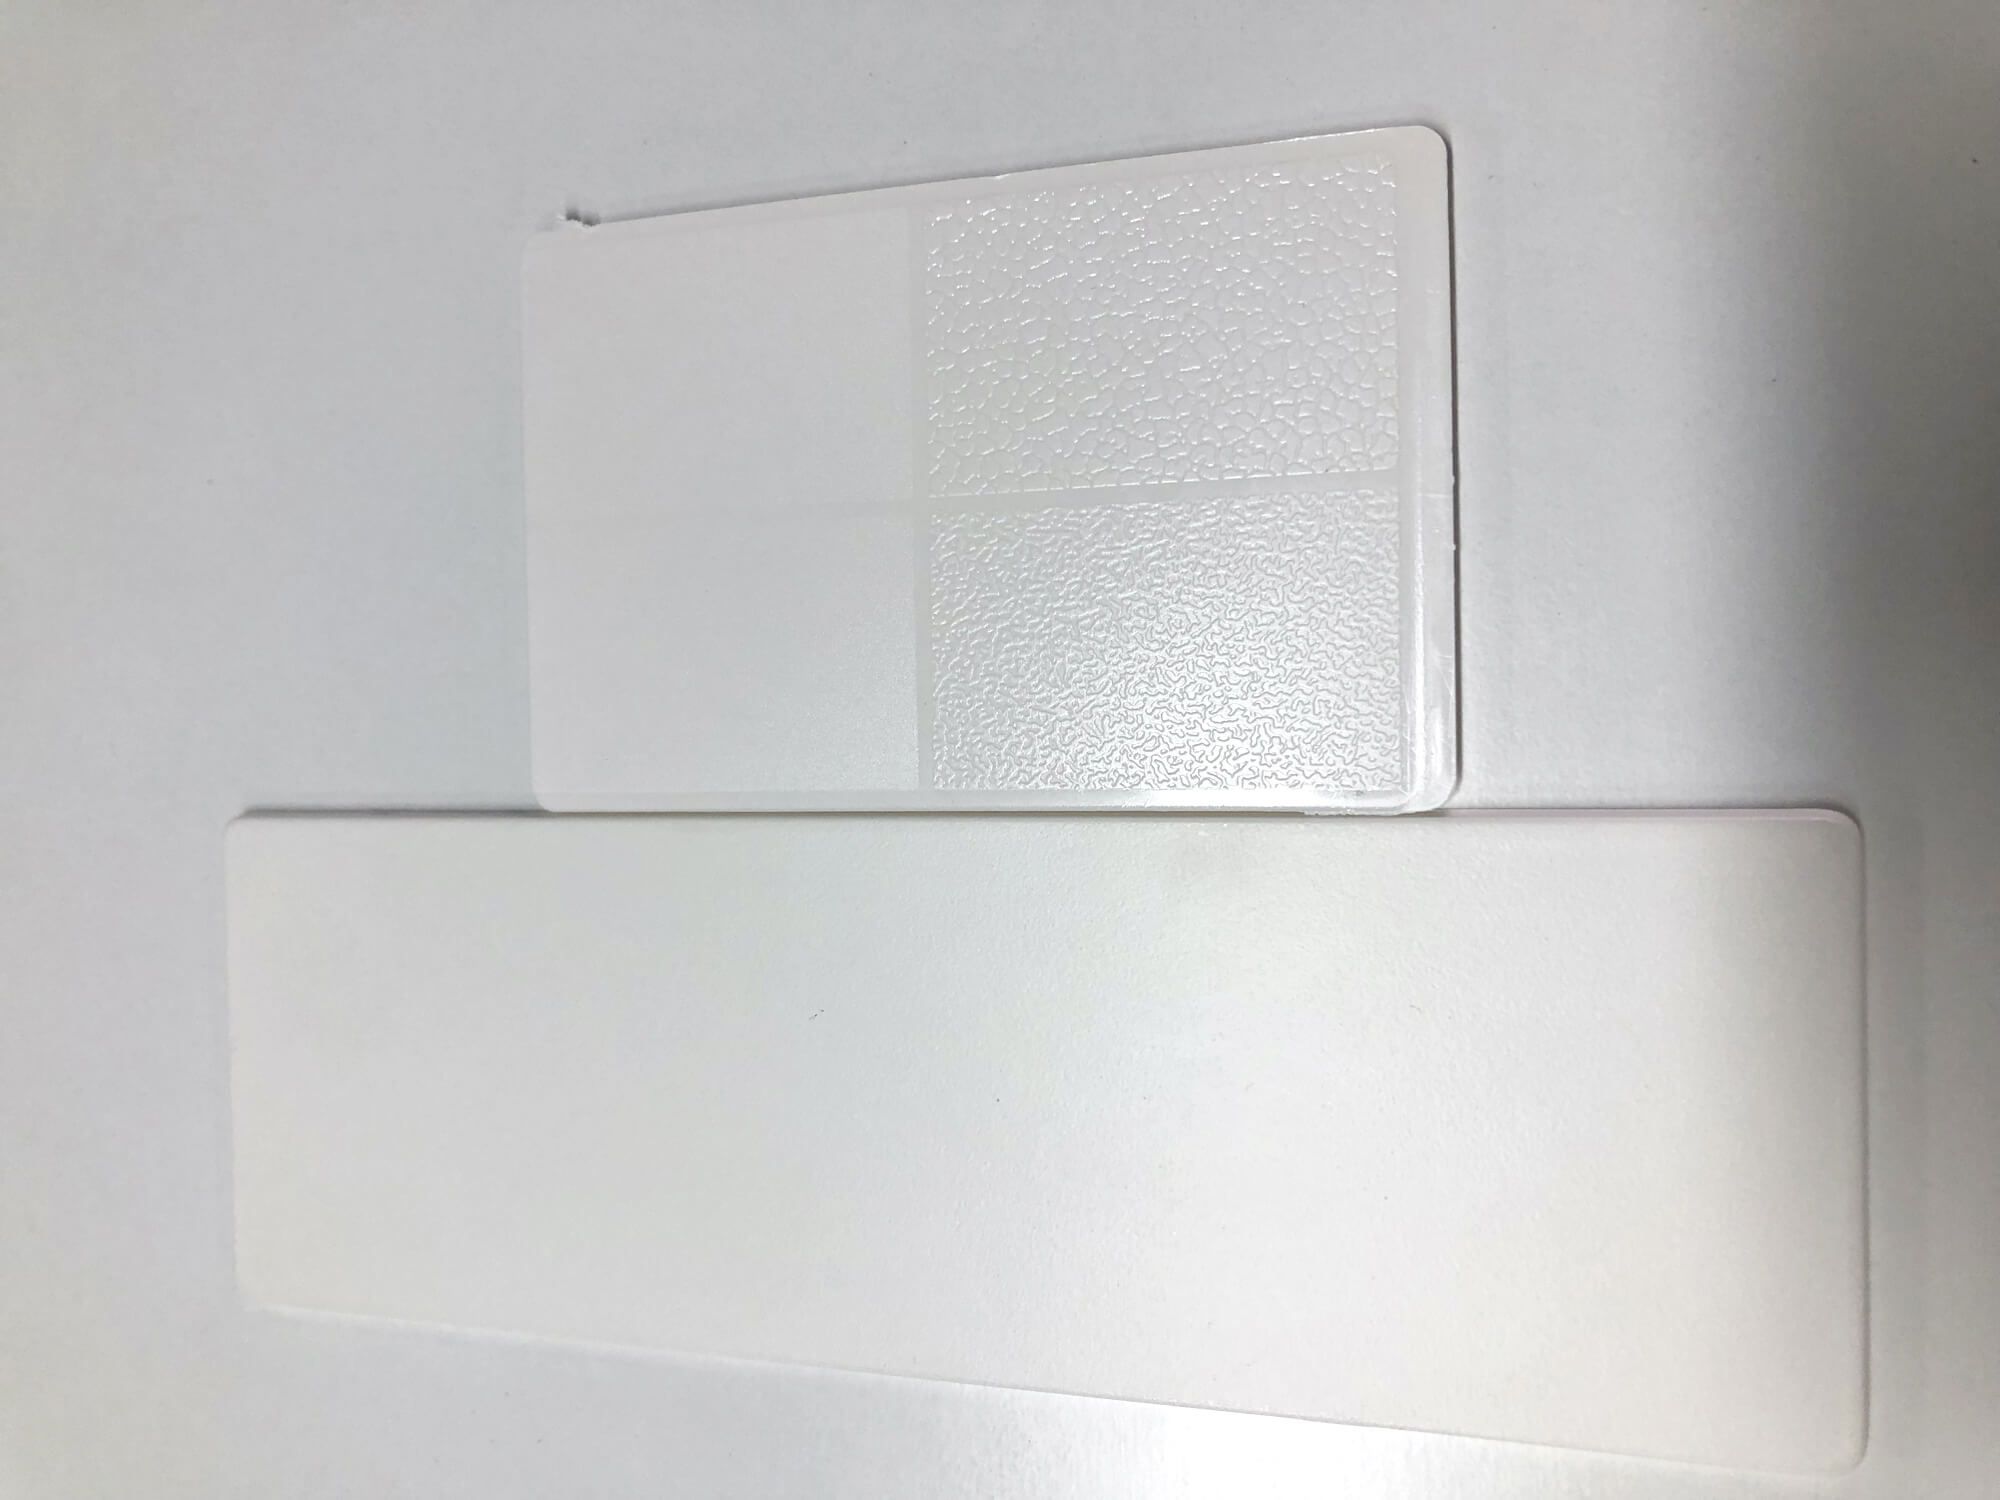
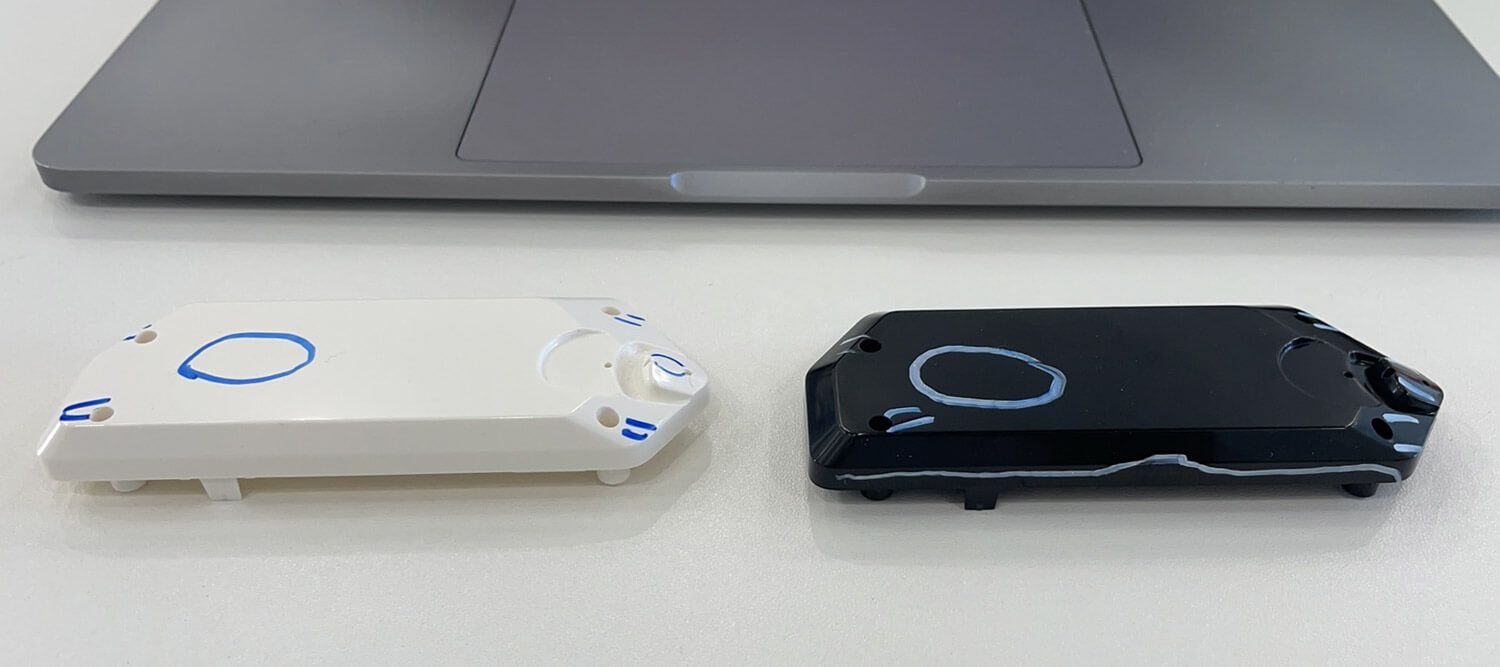
Color mismatch
The color of the part is achieved by mixing the pigment into a mass of liquid plastic. In addition to the color pigment, there are special UV-protective additives. Because of this, it is not easy to get the color you want. In the photo below it is difficult to see, but in reality the finished button is much darker than the color sample on the left.
Sink marks, stress marks
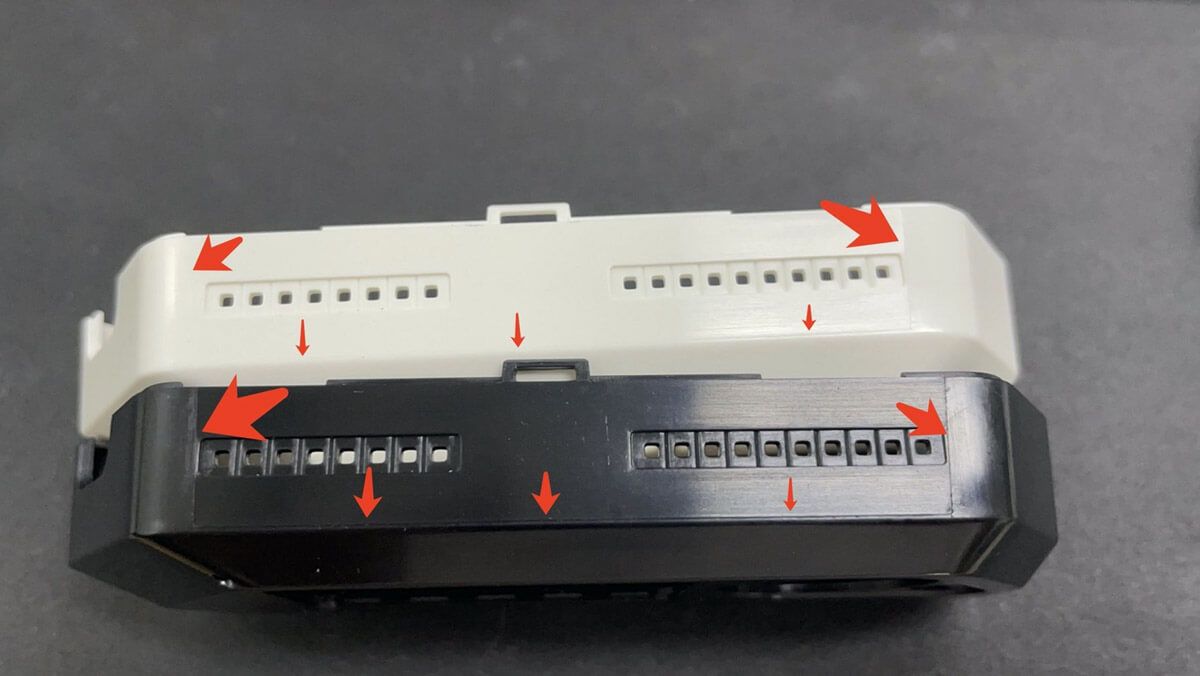
Due to uneven cooling of the part, minor defects arise: noticeable seams, stress marks. Such defects are corrected by adjusting the heating and plastic injection pressure.
Moving parts can leave a seam called parting line. According to our specification, the parting line should be less than 0.05mm. To remove it, the factory adjusts the joints more precisely and grinds the surfaces.
Silicone cases
The cases turned out to be unrealistically great: very dense and nice to the touch matte silicone, just like branded iPhone cases. We did not expect that the very first samples will be that cool. The shape will be slightly altered so that the cover does not protrude next to the screen, but in general everything is fine.
Starting from April 15, cases cannot be added to the order, but they will be on sale in Fall in our online-store.

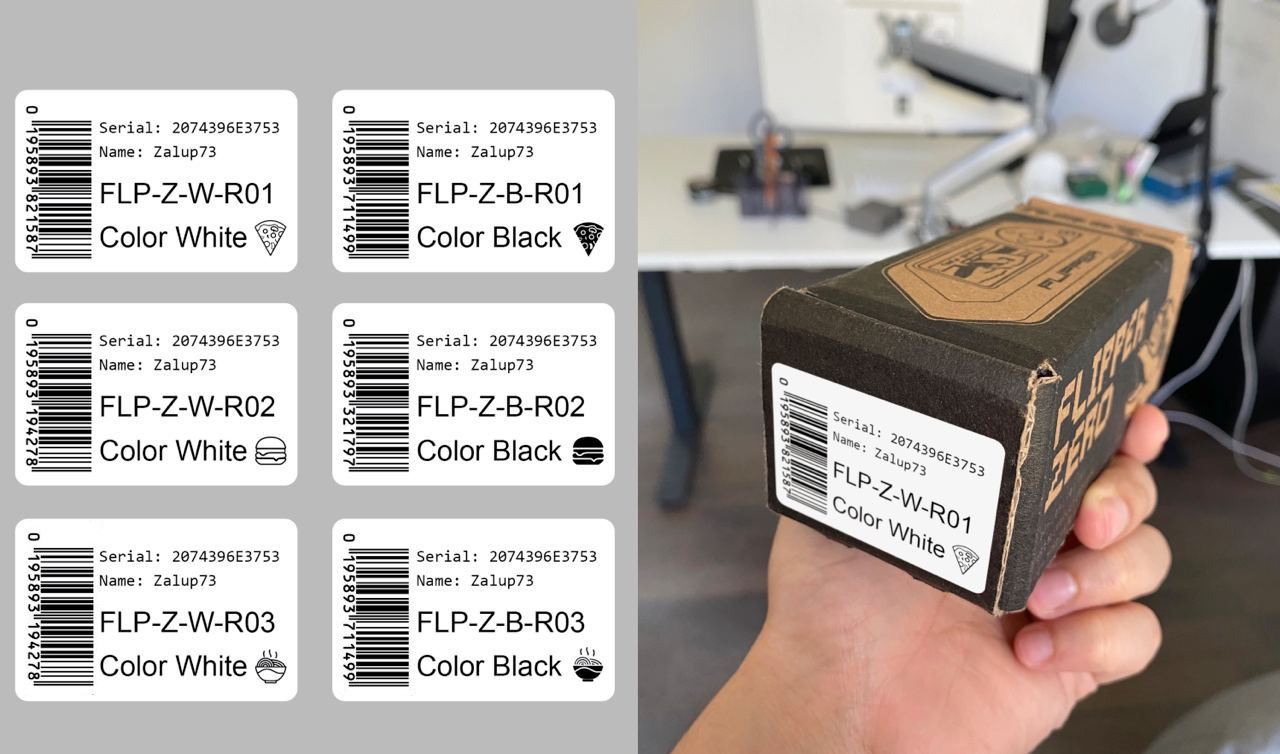
Packaging and SKUs
Getting ready for worldwide shipping! We have already received official barcodes from GS1. Already preparing customs classifications and other important papers. These food icons are our internal designations of regions and colors, so that it is easier to distinguish them visually.
Shipping ETA
We’re all impatient when it comes to cool stuff like Flipper Zero! Let us reassure you: despite difficult times around the world, we are doing our best to keep the shipping schedule the same.
As you may have noticed, we charged your cards for shipping costs, taxes and add-ons in April. We did this to get the exact count of devices to produce and to plan shipping.
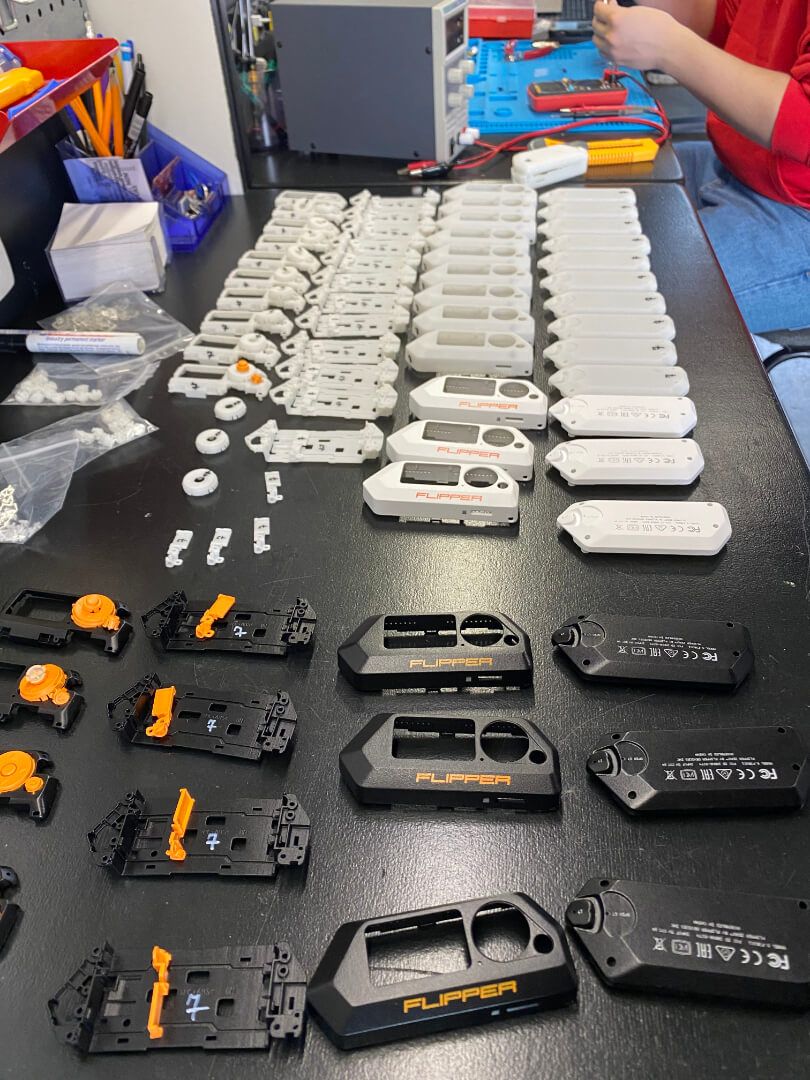
All these Flippers were assembled and shipped to some of our community devs for testing:
Large batches of final Flippers are to be produced and shipped in Summer, right as we expected.
We will keep you updated on the production process, so stay tuned!
![]()